Adding images to POS buttons from SIMS
You can assign images to Buttons to help POS users identify a product more quickly during a sale.
Buttons pictures are best created from SIMS so they can be replicated to all POS stations in the company.

Images selected must not be more than 24bit. You can use an image editor program like Paint.net to save images in 24bit format.
- In SIMS, go to Main > Point of Sale > Others > Touchscreen.
- In the Custom Buttons tab, choose a button group.
- Go to the Custom Layout tab, highlight the line to which the picture is to be added and press on Picture Preview.
- In the next box, select your file, then click OK.
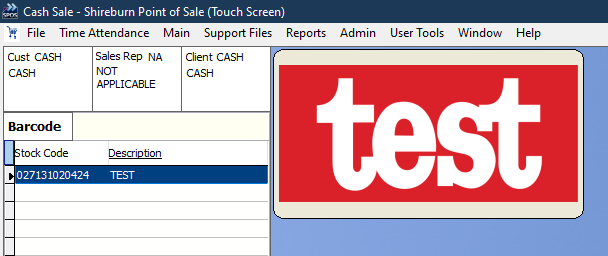
- A preview of the picture will load in the Picture Preview area in SIMS.
- Once the picture is uploaded into SIMS, POS will replicate automatically and the new picture should be visible in each corresponding button.
If the newly added picture does not show up in POS after replication, the user will need to push a full replication of that table.
- To carry out a full replication from SIMS, go to Main > Point Of Sale > POS config.
- Search by table name for tslayout and btlayout. For each table, carry out the following:
- Click on the Range from and Range to so that only that table will be visible on all POS stations.
- Then click on Mark ALL Next Full.
- All buttons and pictures will be refreshed on all POS stations in the company and any changes will be applied.
- If in TouchScreen Button Layout > Custom Layout, the TYPE is C, the picture will only be assigned to the category button. Pictures cannot be assigned to individual items when you are using a category.
If you want a button to act like a category, then:
- Create a button group.
- Add items as Type S(Stock card).
- Allocate pictures.
- Add the new button group to the main group with Type B (Button group).
- If the Type is S as in stock cards, then pictures can be assigned to individual buttons.
Please note that a button cannot have both text and a picture. If the user wants both of these, then they have to be edited using a picture editor and then replaced for each button accordingly.
Very important: install the below software on every POS so that pictures will be displayed properly. During the installation, all POS programs must be closed.
Related Articles
How to re-download a table from SIMS to POS if data is missing from POS
POS users can update a price or add a new stock card from SIMS, but sometimes these changes are not shown in the POS system even if it has replicated multiple times. We can re-download the whole table from SIMS so that the items or ...How to set up POS schemes from SIMS
Attached with this article is a document that details how you can set up POS schemes from SIMS.How to Reindex SIMS
Reindex is mostly used to fix corrupted indices. If they are not repaired, the utility will indicate which databases need attention. - It is important that all users are out of SIMS (and SFM if applicable) or else an alert will pop up that another ...How to Update SIMS
For optimal results, update SIMS directly from the server. Important notes before updating: - SPOS Users: Close the POS replicator. - All Users: Log out of SIMS and SFM (if applicable). - Remote Desktop Users: Log out of SIMS and SFM before ...How to run the SIMS Archive process
The SIMS Archive function reduces the size of the data store in Live by splitting the same data set in a different database, within the same company. This process improves the SIMS performance as it compacts the Live data set. Users can then access ...
Recent Articles
How to generate a Report by Transaction Type and Analysis Code
Generating a Report by Transaction Type in SIMS Navigate to SIMS > Reports > Miscellaneous > Analysis Code. From this screen, select the desired Transaction Type to apply as a filter. If a summarized version of the report is required, tick the ...How to Set Off a Client / Supplier
The Set Off functionality in SFM allows you to offset outstanding balances between a client and a supplier when the same entity exists in both roles. This feature is particularly useful when a company has pending sales invoices due from a client, ...Exporting or Importing Documents in Windows App
Using the Correct Redirected Path When connected through the AVD Windows app, you must export or import files using the redirected drives. Internal AVD paths (such as C:\Users or Desktop inside the session) do not allow saving and will cause ...How to Activate Advanced Commission
Advanced Commission Overview The Advanced Commission feature provides the ability to customize commission settings for all salespersons within the system. Enabling Salesperson Commission To activate this functionality, navigate to: SIMS > Admin > ...How to Delete a user on SIMS
Note: We do not recommend deleting a user from SFM for audit and compliance purposes. Example: If you have a user with the initials JD (John Doe), and that user has previously submitted entries as shown below, deleting the user will remove the ...
Popular Articles
How do I process an End Of Year in SFM?
Overview SFM allows posting into two financial years simultaneously. This means that users do not need to finalise 2025 before starting to post entries into 2026. The end of year procedure will move the “Current Year” data into the "Previous Year". ...Do I need to Process an End-of-Year in SIMS?
SIMS does not require an end of year procedures to be run. However, SIMS controls users to only allow posting of transactions, such as sales invoices, cash sales, adjustments and purchases, within a range of dates referred to as the Posting Period. ...How to setup a System Control Account in SFM? (Bank Account, Cash Account, Stock Control, etc...)
Create the Account in your Chart of Accounts as seen below. Please make sure you use the code depending on your Heading and Sub-Heading digits. After creating the account, you need to specify the account as a System Control Account. Go to Support > ...How to reset your Shireburn remote desktop service (RDS) account password
The password for the Shireburn RDS Account used to connect to RDS server is set to expire after 90 days. A notification is provided to the user daily starting 5 days prior to the expiry date. In order to change password, the following steps need to ...SIMS - User Manual
The attached PDF includes the necessary functions and features of SIMS to get you started. SIMS User Manual.pdf